Upgrade Project

In this lesson, we will guide you through the process of upgrading your Webiny project to a paid license using the Webiny Control Panel (WCP). Upgrading your project allows you to access the premium features.
In this lesson...
Here are the topics we'll cover
Introduction to Webiny Control Panel.
Terminology that's important to understand.
Steps to upgrade a project license.
Accessing premium features after upgrade.
Introduction to Webiny Control Panel
The Webiny Control Panel (WCP) is a web-based interface that allows you to manage your Webiny projects and their associated licenses. It's the central hub for upgrading your project to a paid license and unlocking premium features. You only need to use WCP for projects where you want to enable paid features; for free projects, WCP is not required.
Once you create a project inside WCP you'll use Webiny CLI to link your Webiny instance to that project and with that your instance will get access to the premium features enabled by the license.
No credit-card or any payment information will be required at any point during this course as we'll be using the free tier that's available. In addition, in this particular lesson we'll only go through the upgrade process to demonstrate how it works. There is a whole dedicated course that covers WCP in more detail.
Important Terminology
Before we proceed with the upgrade steps, it's essential to understand some key terminology.
When we talk about Webiny Control Panel, we have the following concepts and they only apply within WCP:
- Organization: An organization in WCP is a container for multiple projects. It allows you to group related projects together and manage them under a single entity.
- Project: A project in WCP represents a structure that holds information about the license, environments and team members.
- License: A license defines the level of access to Webiny's features. There are different license tiers, such as Free, Business, and Enterprise, each offering varying levels of functionality.
- Team Members: Users who have access to a specific project in WCP. Team members can collaborate on managing the project and its license. Team members in WCP have nothing to do with users in your Webiny instance.
- Environment: An environment represents a specific deployment of your Webiny instance (e.g., development, staging, production) and is linked to a project in WCP to manage its license.
When we talk about Webiny Instance (the actual deployed application), we have the following concepts:
- Webiny Instance: This refers to the actual deployment of Webiny on your infrastructure (e.g., AWS, local machine).
- Users or CMS Users: These are the users who interact with your Webiny instance, such as content editors or administrators. They are different from team members in WCP.
Steps to Upgrade a Project License
To upgrade your Webiny instance to a paid license, follow these steps:
-
Log in to the Webiny Control Panel: Visit https://app.webiny.com/ and log in with your Webiny account credentials. If you don't have an account, you can create one for free.
-
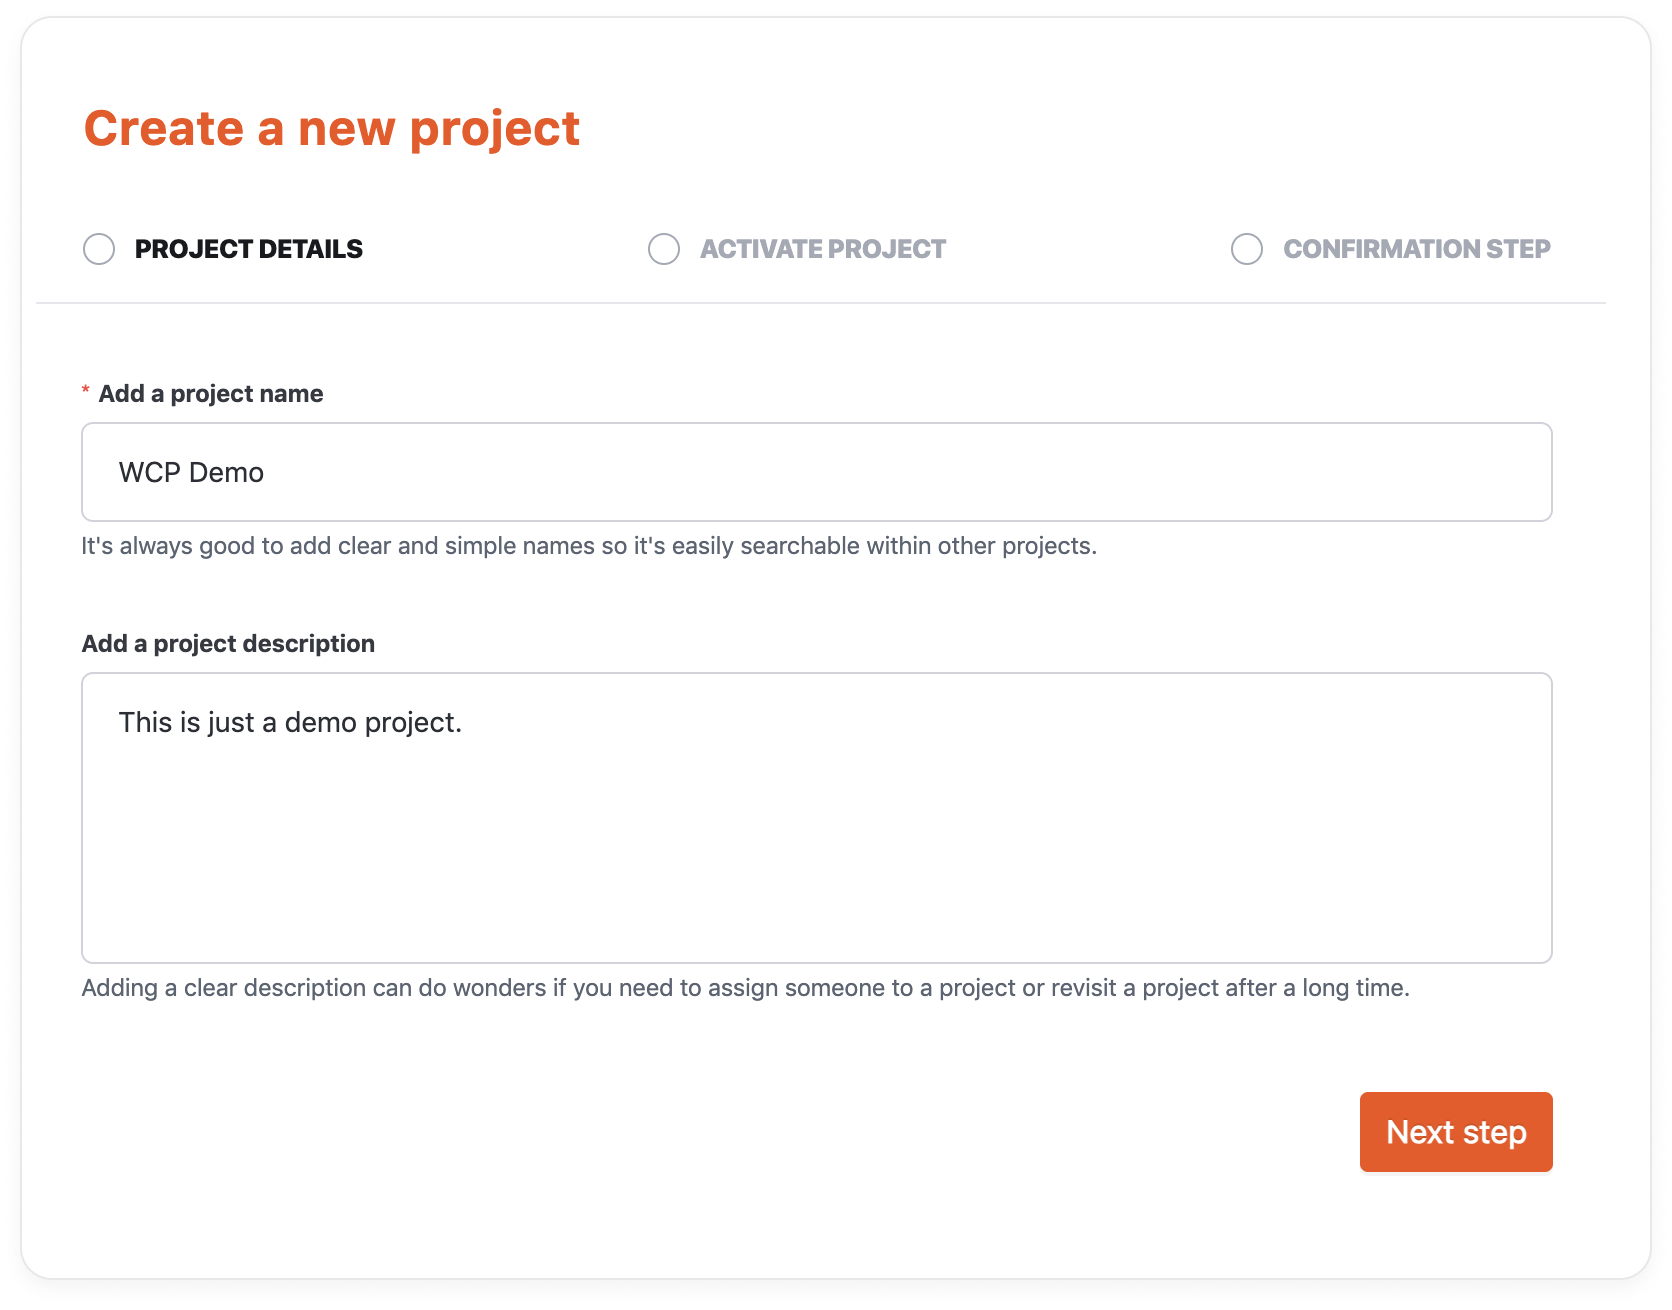
Create a New Project: In the WCP dashboard, create a new project. Provide a name and description for your project.
- Activate Project: The process of activating a project is all about linking your deployed Webiny instance to the project you just created in WCP. This is done using the Webiny CLI. Now since we already have a deployed Webiny instance from the previous lessons, we can proceed to link it to the project, which is the command from step 2.
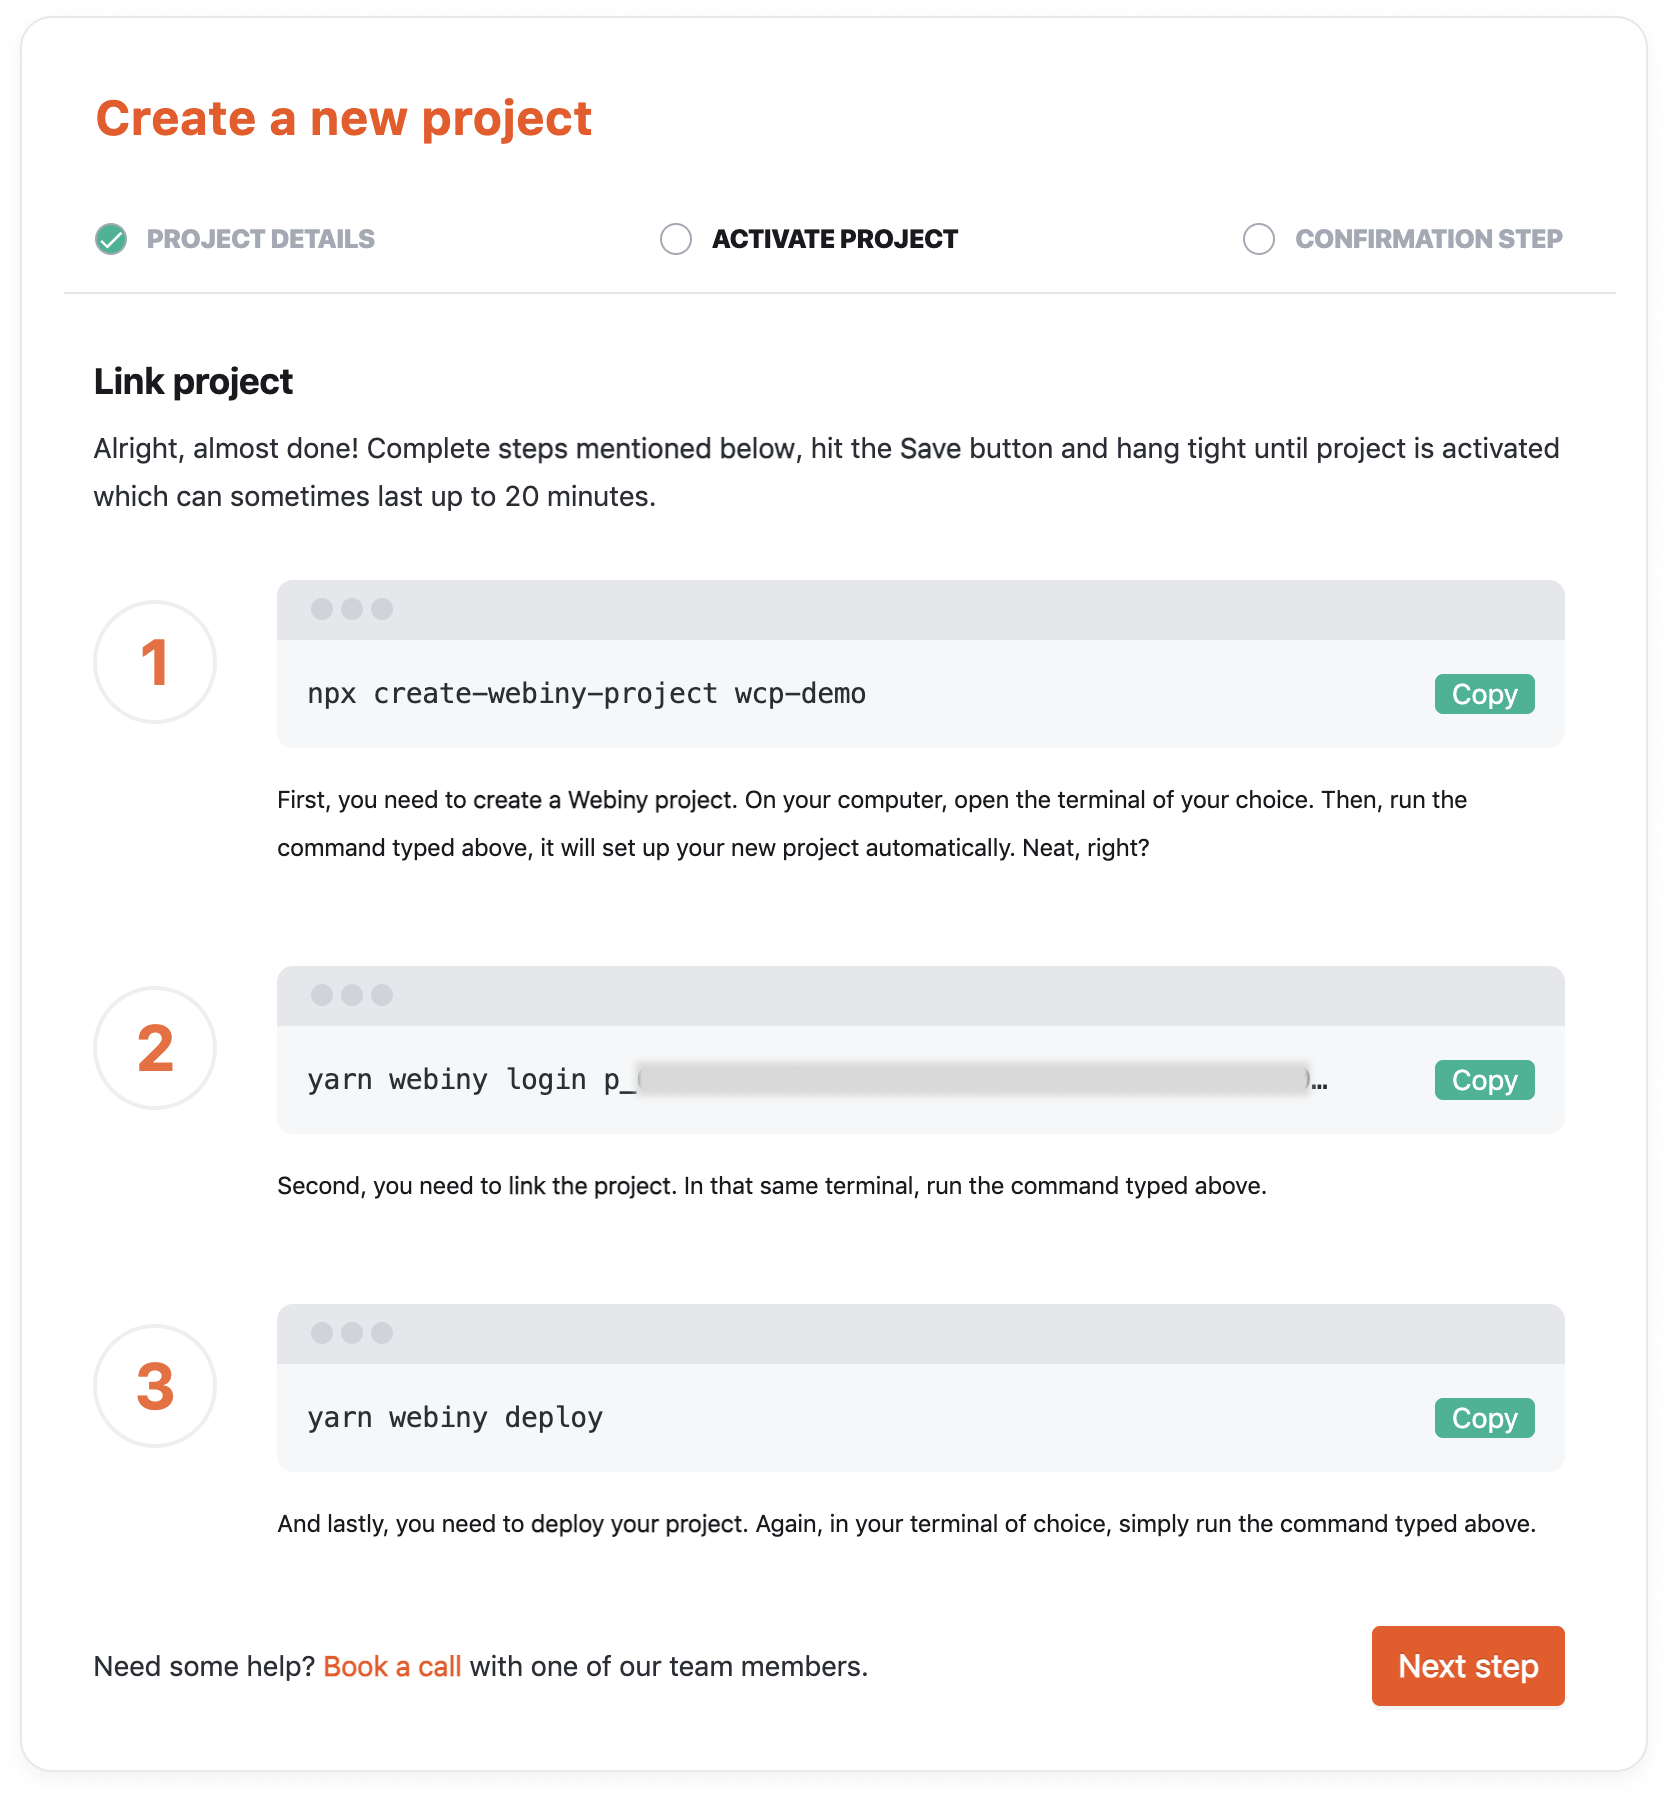
- (re)deploy your Webiny instance: After linking your Webiny instance to the project in WCP, you need to redeploy your Webiny instance to apply the changes and activate the paid license. Use the Webiny CLI to redeploy your instance.
And with this your instance is now upgraded to the Business tier and you can start using the premium features like the multi-tenancy, advanced ACL and more.
This is all we'll explore from WCP in this course, but if you want to learn more about WCP and how to manage your projects and licenses, we recommend checking out the dedicated course on Webiny Control Panel available in the Learn Webiny Portal.