Creating a Content Model via UI
In this lesson, we'll create a real content model using the Webiny Admin UI. We'll build a Product model for an e-commerce scenario, giving you hands-on experience with Webiny's visual content modeling tools.
In this lesson...
Here are the topics we'll cover
Using the content model builder interface.
Creating a Product content model.
Configuring fields and validation rules.
Accessing the Content Model Builder
First, let's navigate to the content model builder in the Webiny Admin:
- Open your Webiny Admin application
- In the main menu, click on Content Modeling
- Click on Models
- Click the + New button
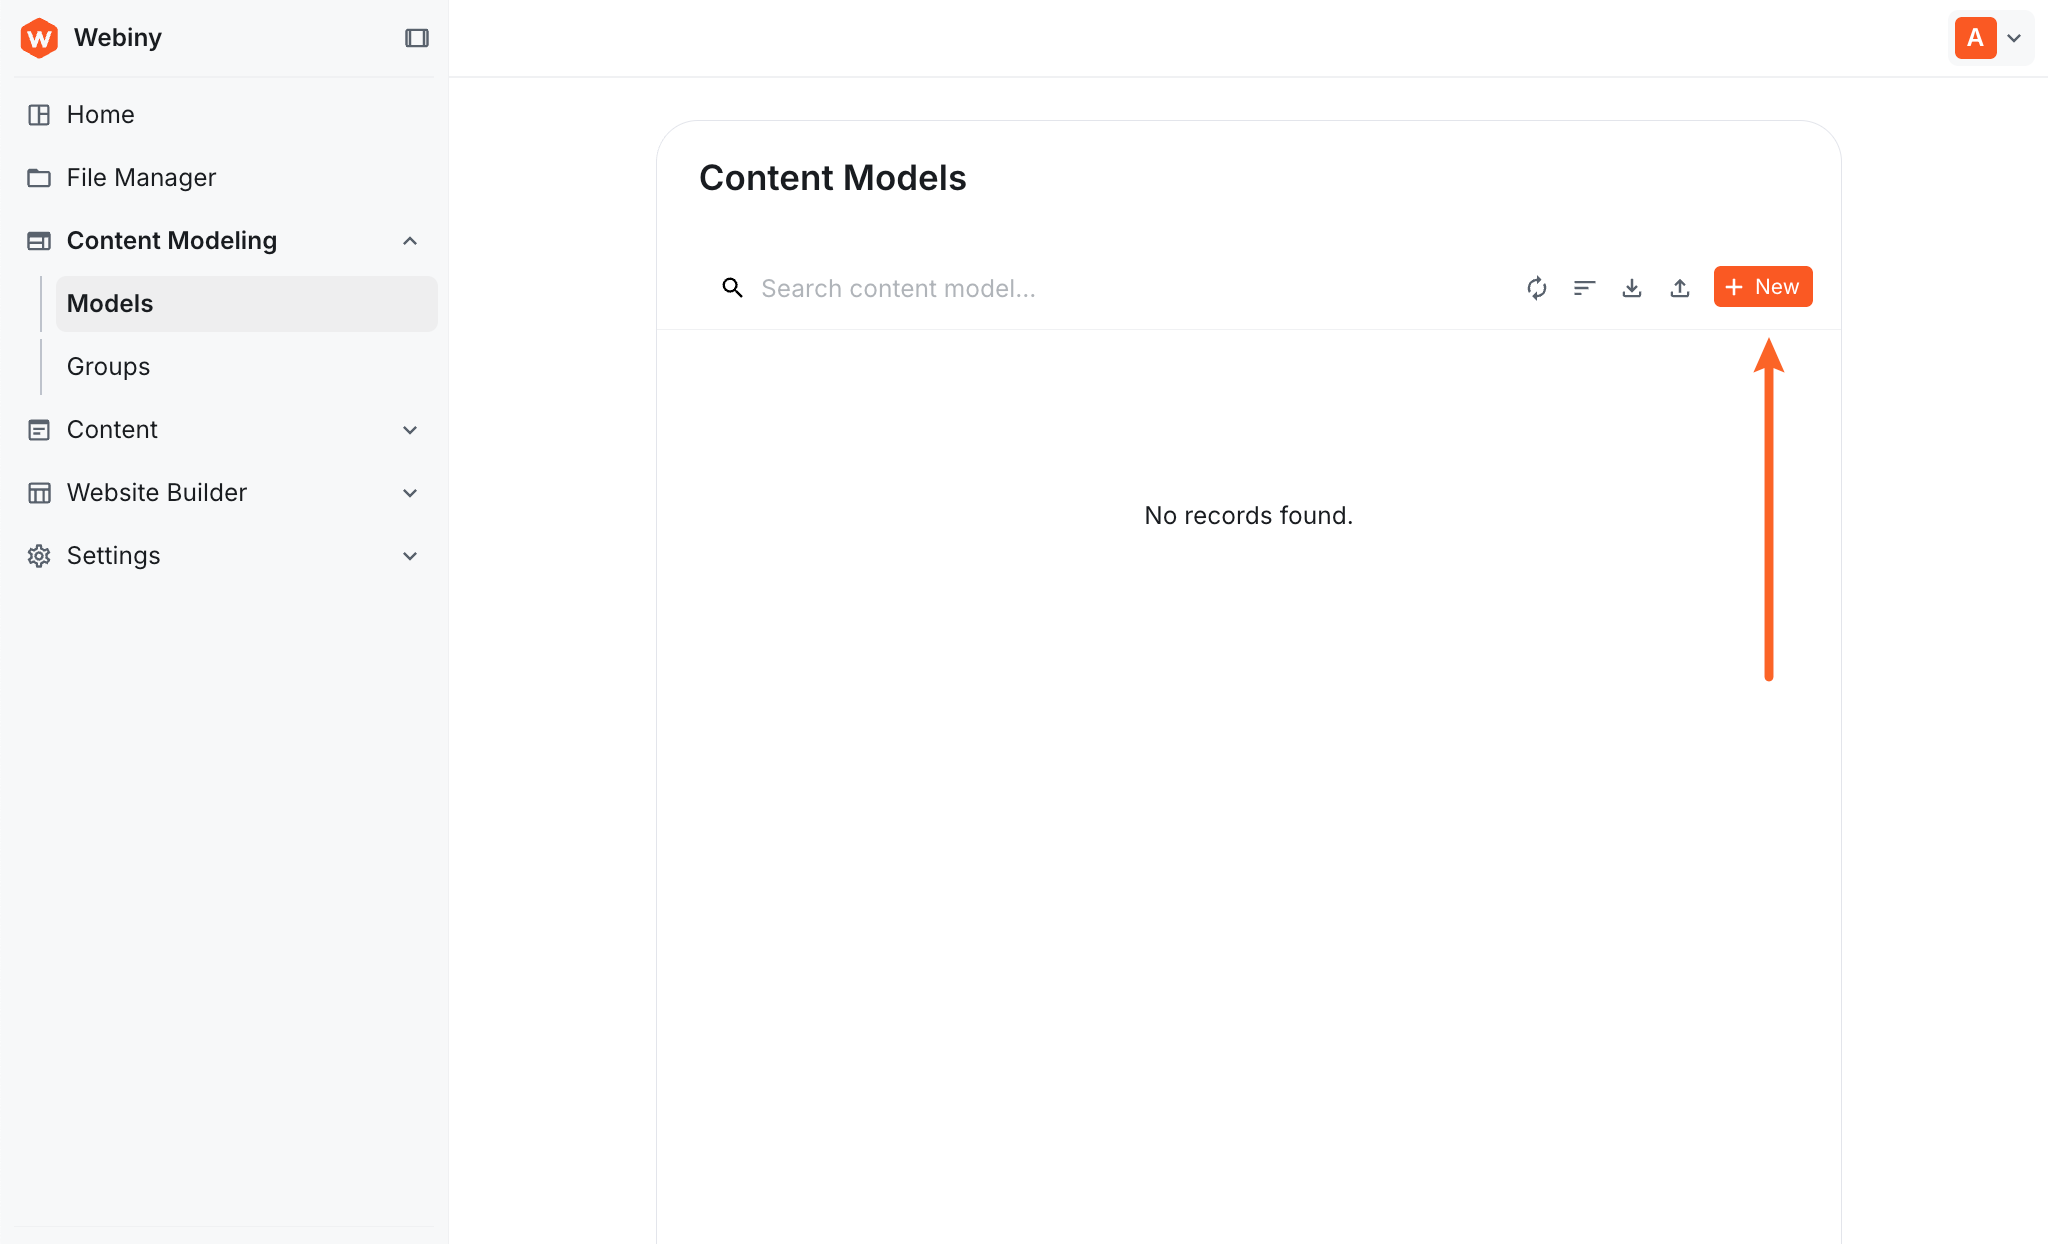
This will open the "New Content Model" dialog where you'll configure the basic information about your model.
Creating the Product Model
Let's create a Product content model with all the fields an e-commerce product needs.
Step 1: New Content Model Dialog
After clicking + New, you'll see the "New Content Model" dialog. This is where you configure the basic information about your model:
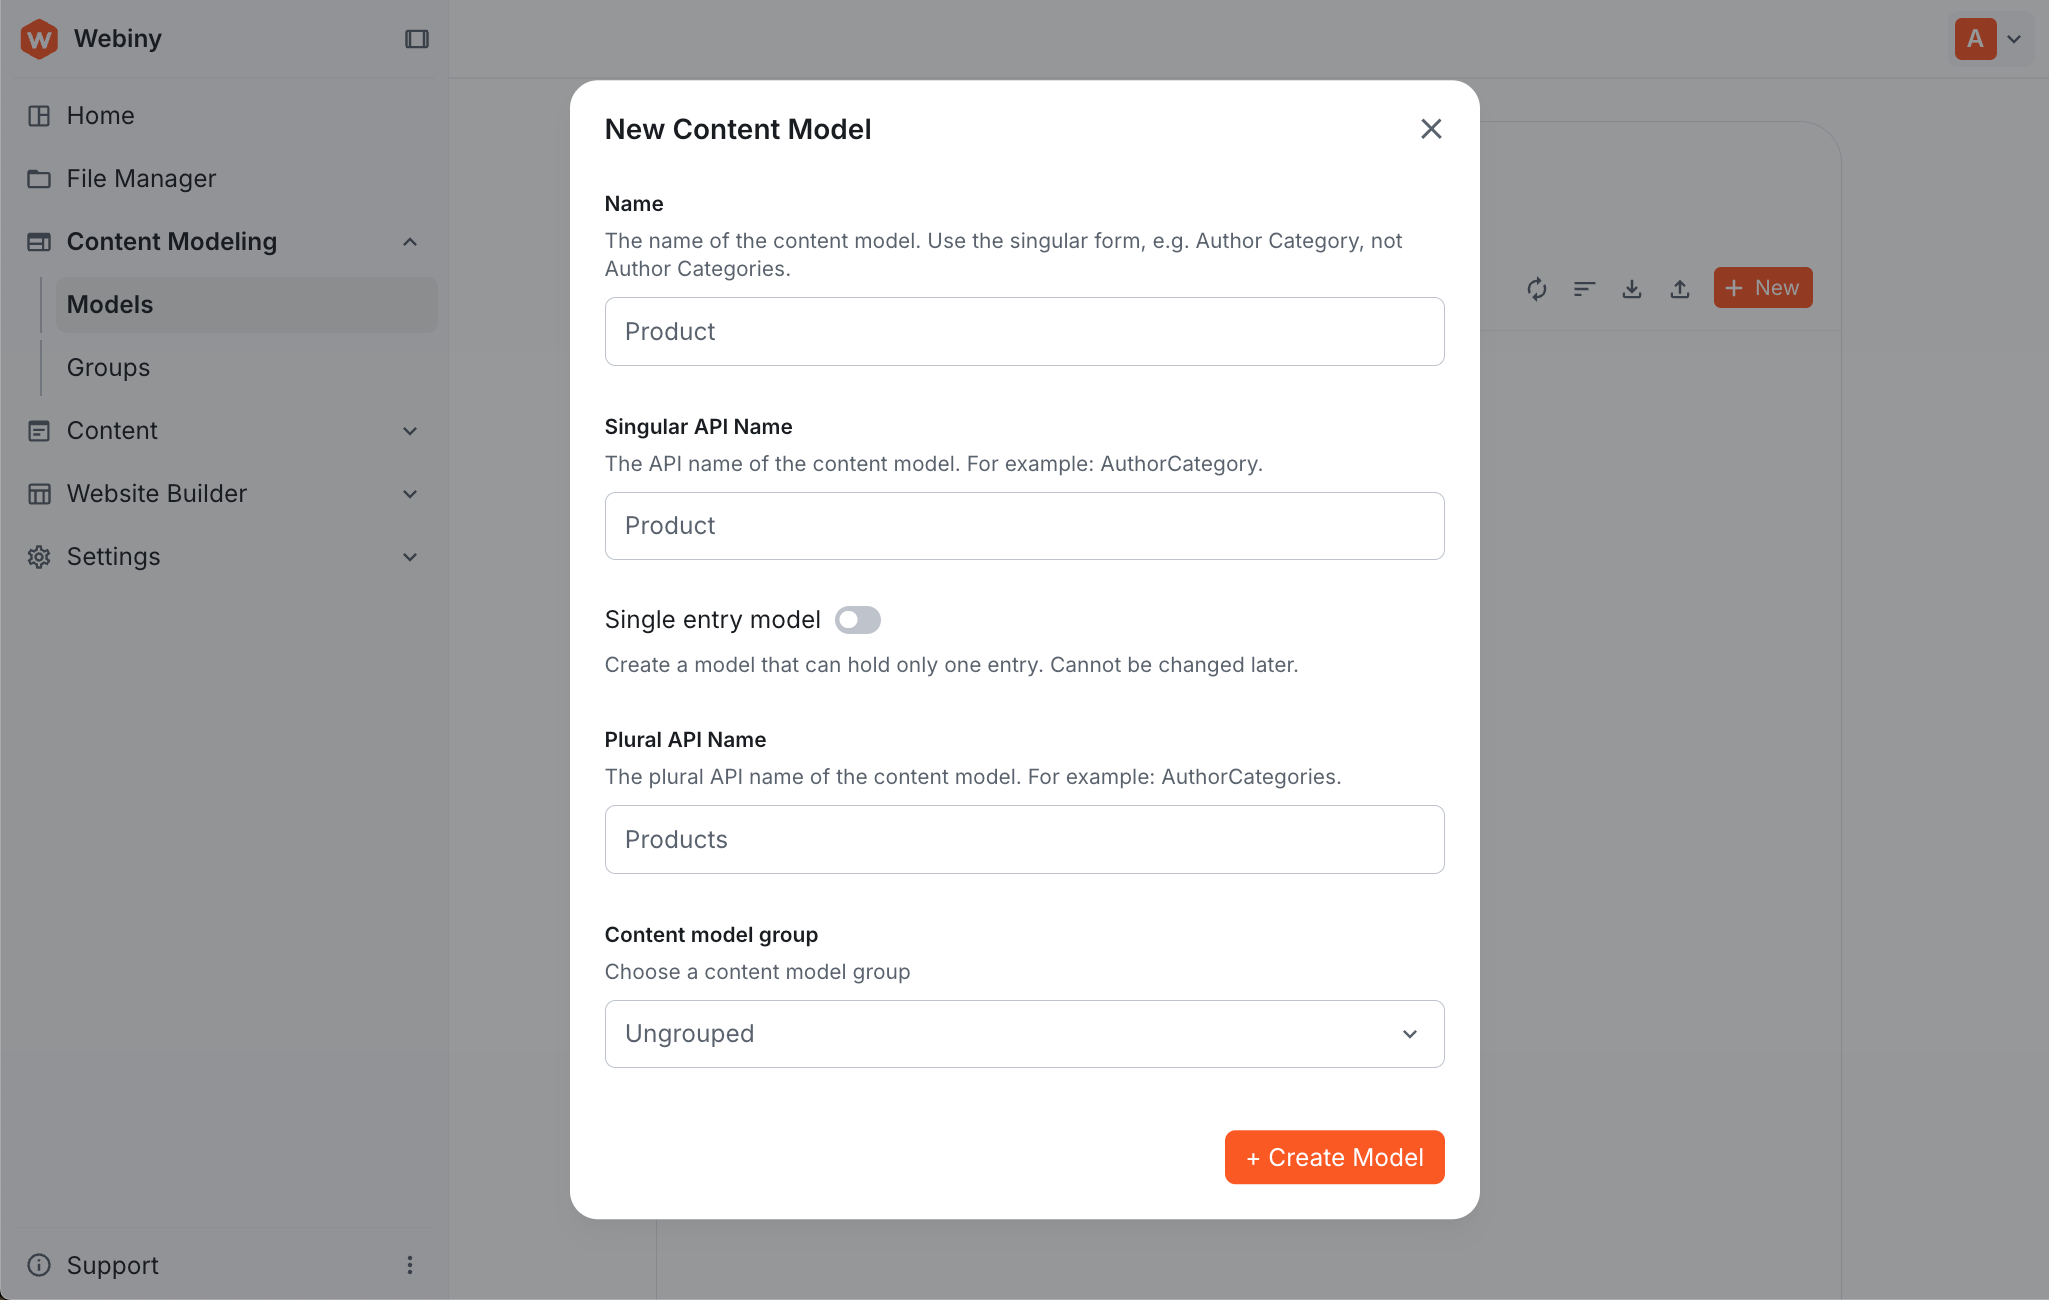
Fill in the following information:
Name
- Enter:
Product - This is the display name of your content model (use singular form, e.g., "Author Category" not "Author Categories")
Singular API Name
- Auto-generated from the name:
Product - This is used in GraphQL queries like
getProductandcreateProduct - Example format:
AuthorCategory
Single entry model (toggle)
- Leave this OFF for products
- Enable this only for models that should have exactly one entry (like site settings or homepage configuration)
- Once created, this setting cannot be changed
Plural API Name
- Enter:
Products(you need to type this yourself) - Used in GraphQL queries like
listProducts - Example format:
AuthorCategories
Content model group
- Select
Ungroupedfrom the dropdown - Groups help organize your models in the sidebar
- To create new groups, you'll need to use the "Groups" section in Content Modeling
The dialog also allows you to select an icon to represent your model and add a description. These are optional but can help you and your team quickly identify models in the Admin UI. Feel free to add them if you like!
Create model with default fields (checkbox)
- Leave this UNCHECKED for this tutorial
- When checked, Webiny automatically adds three fields: title (text), description (long text), and image (file)
- For learning purposes, we'll add our own custom fields from scratch to understand the process better
Click + Create Model to proceed to the content model builder.
The Singular and Plural API Names determine your GraphQL query names. For
example, "Product" generates getProduct and createProduct, while
"Products" generates listProducts. These are auto-generated but can be
customized if needed.
Step 2: Adding Fields
Now you're in the content model builder interface! This is where you'll add fields to define your product structure.
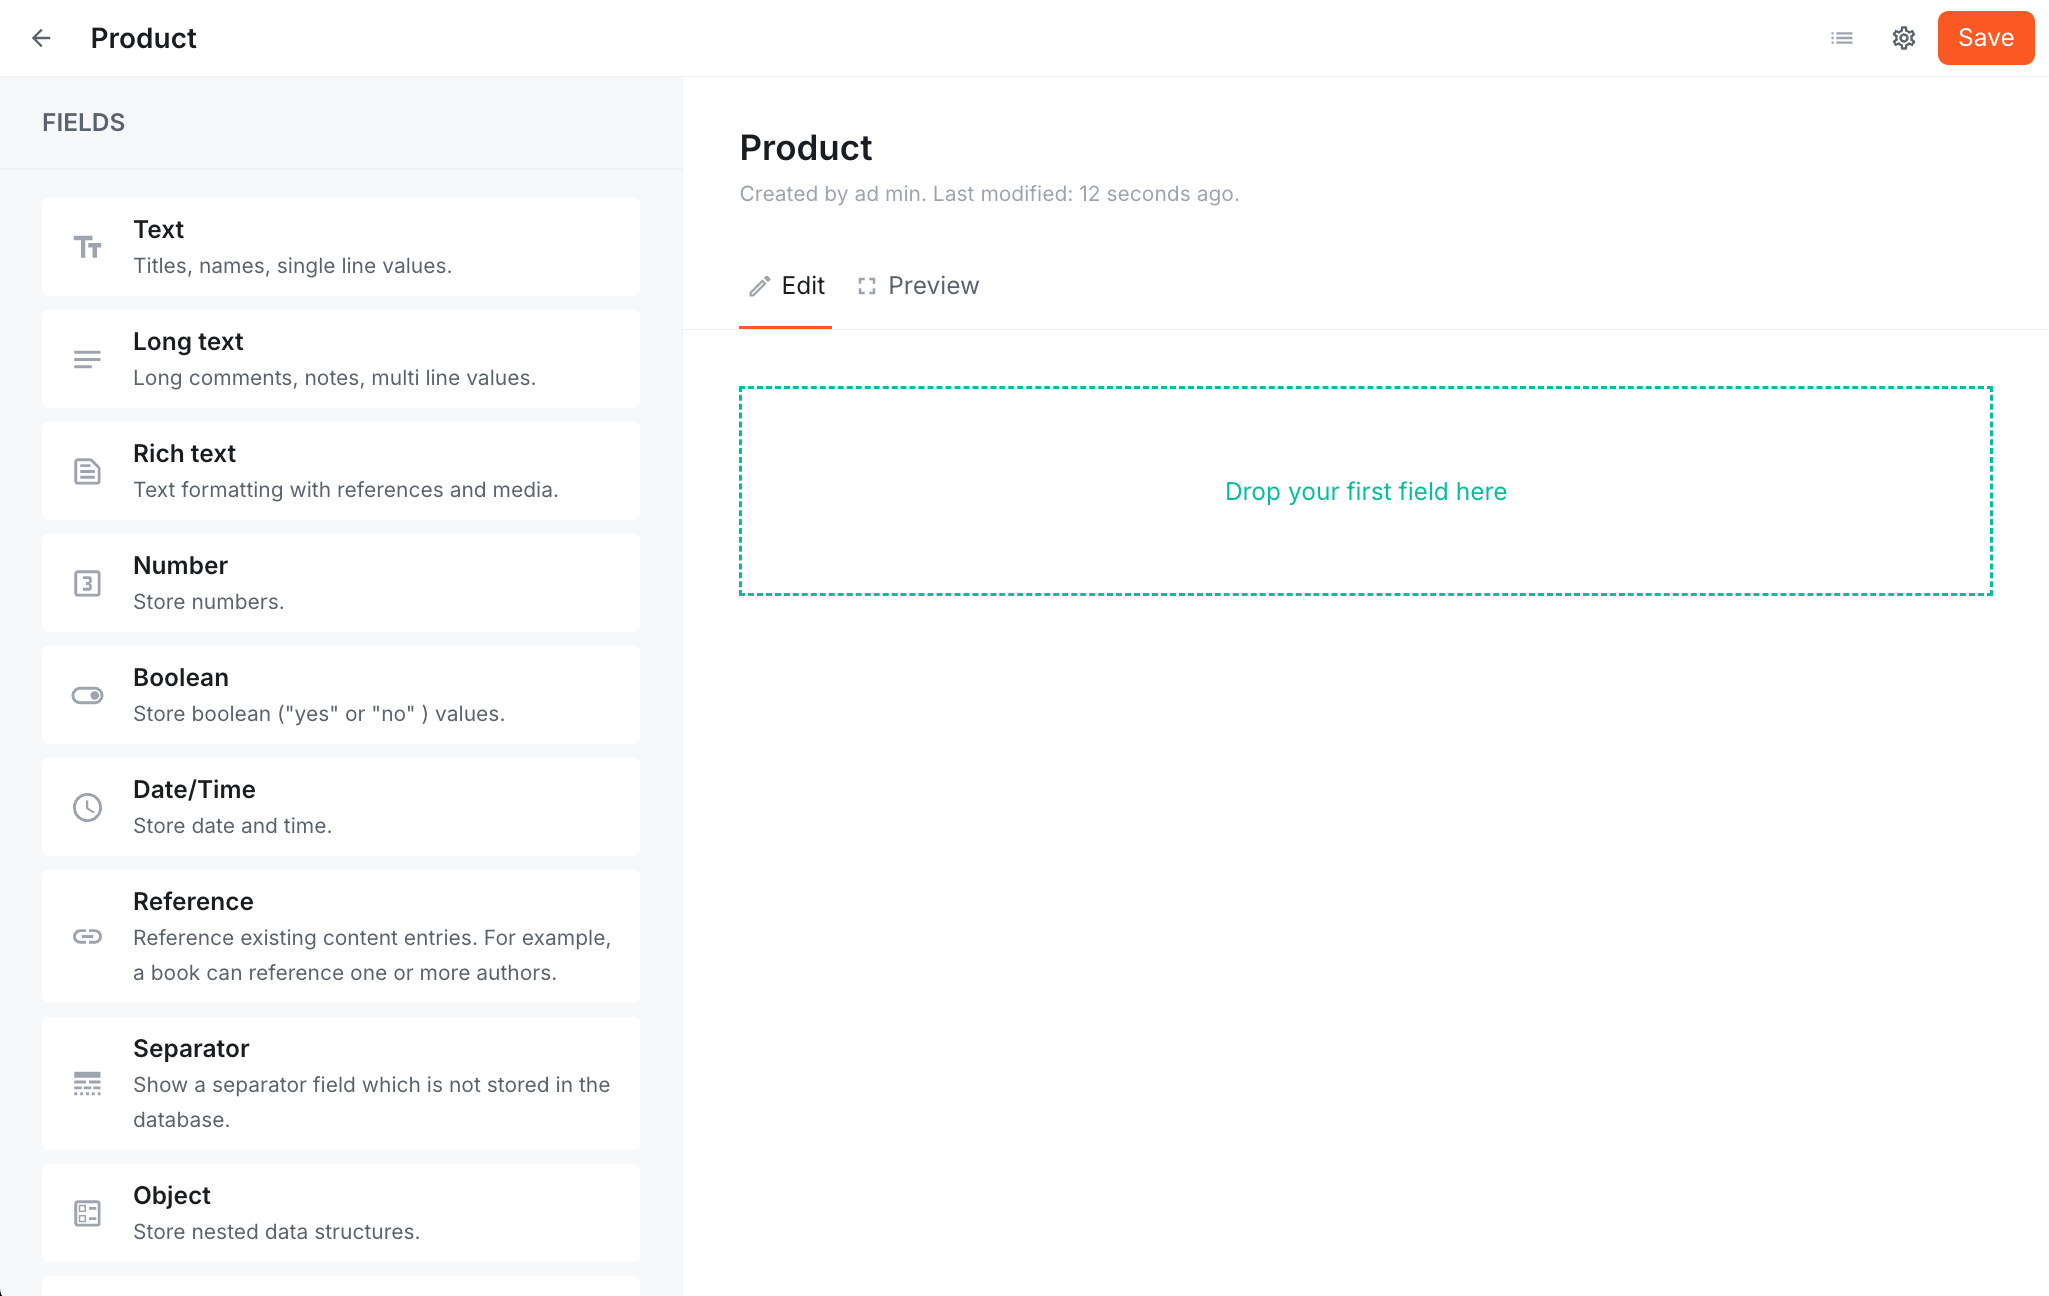
On the left, you'll see the FIELDS palette with all available field types. On the right is the canvas where you'll build your model. Drag a field type from the left onto the canvas to add it.
Webiny's content model builder is designed for non-technical users. You can create complex content structures without writing any code, and the system automatically generates the GraphQL APIs.
Let's add four essential fields to our Product model:
1. Name (Text Field)
Drag the Text field from the palette onto the canvas. A Field Settings modal will appear with multiple tabs.
In the General tab, configure:
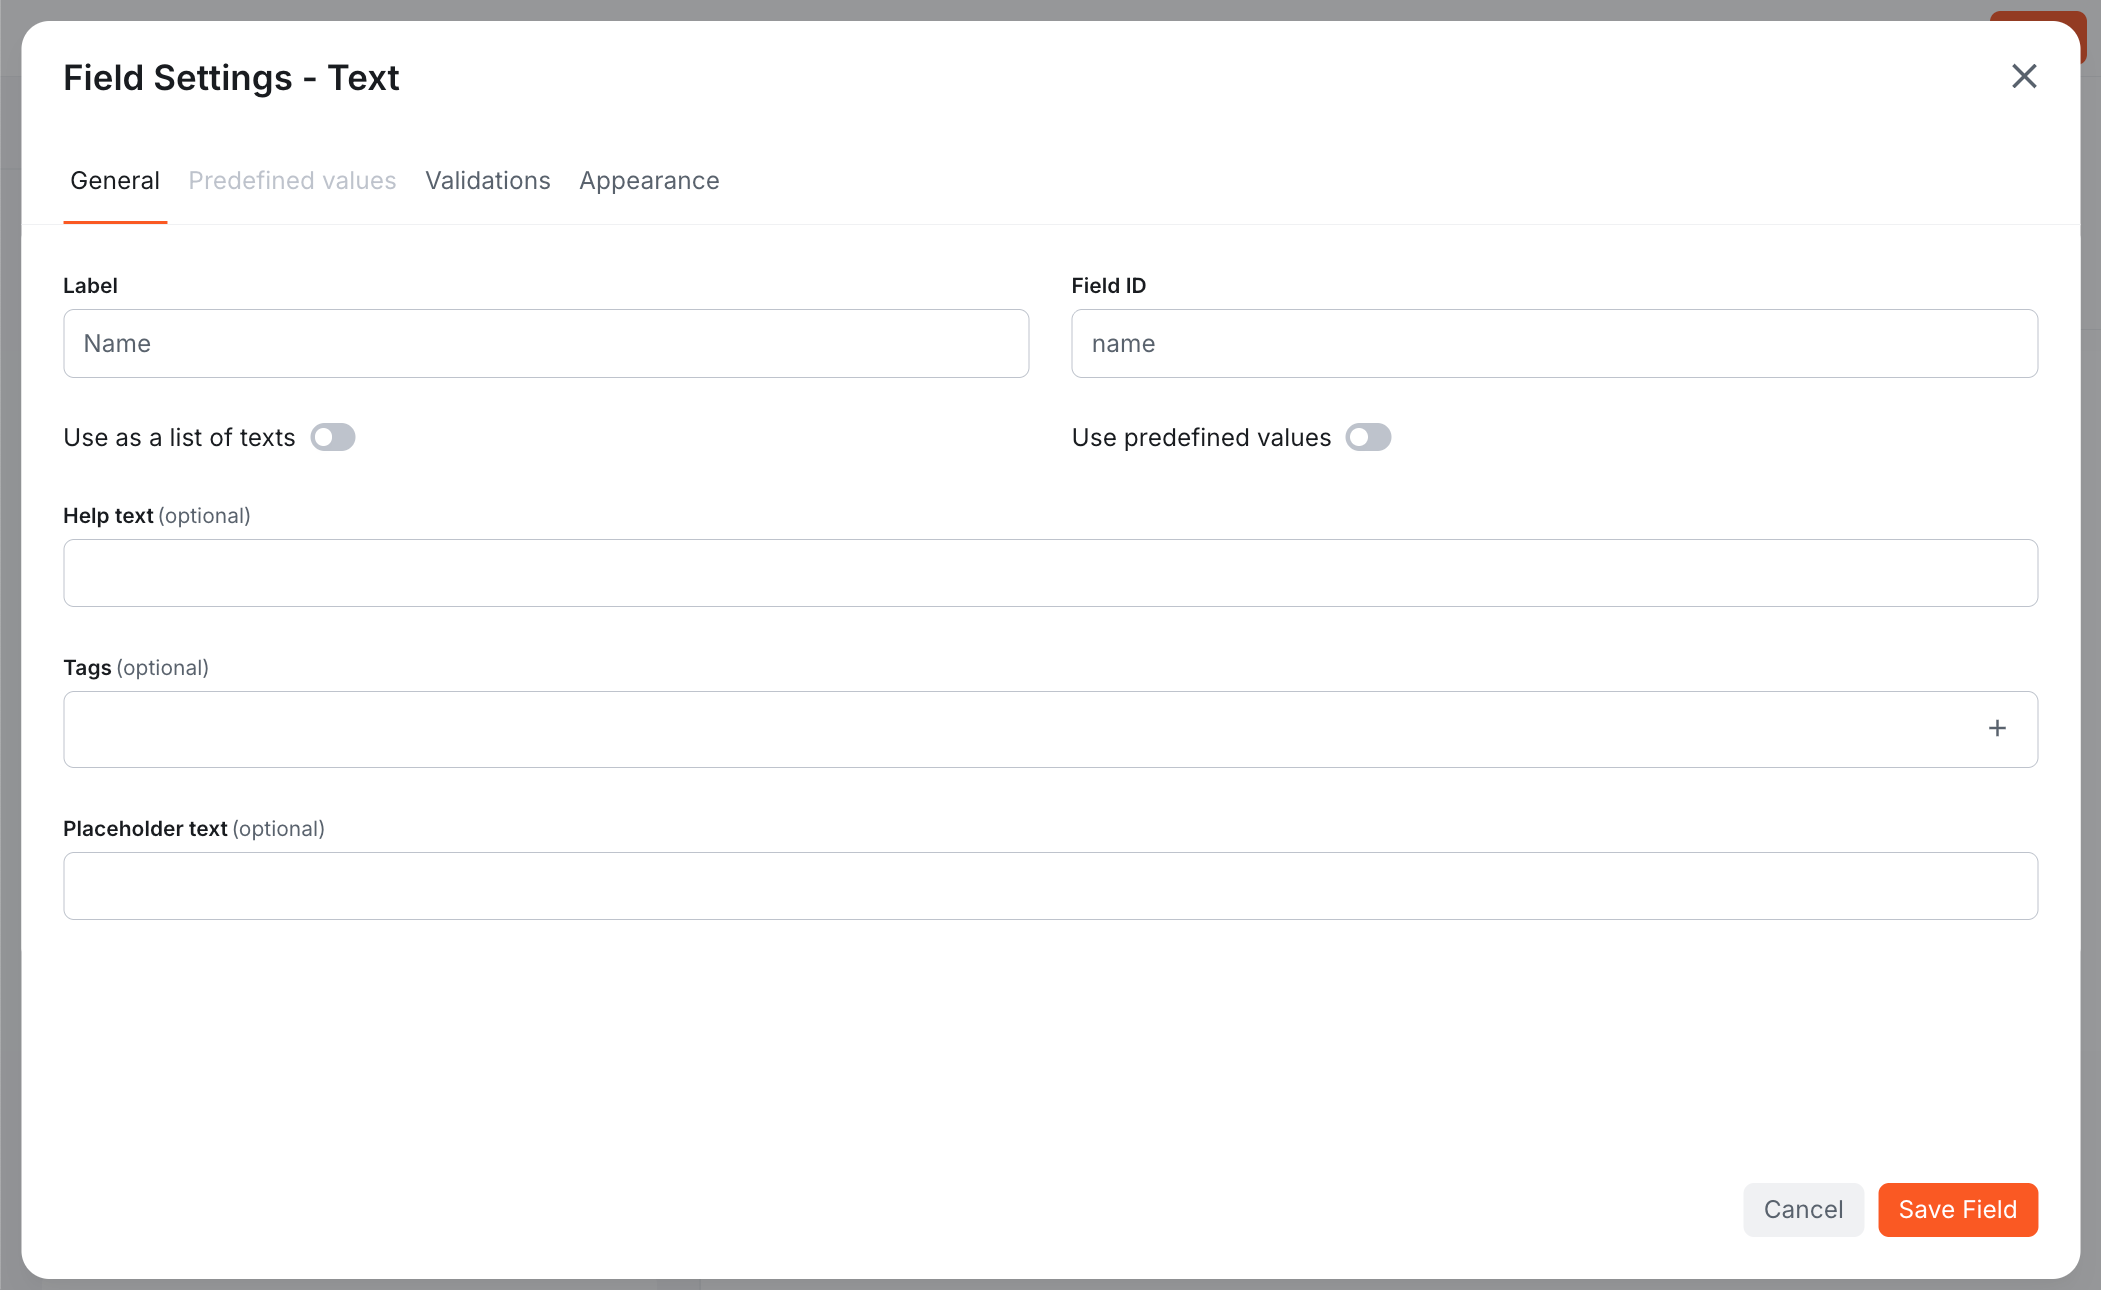
- Label: Name
- Field ID: name (auto-generated from the label)
- Help text: (optional) Helpful hint for content editors
- Placeholder text: (optional) Placeholder shown in the input field
Switch to the Validations tab:
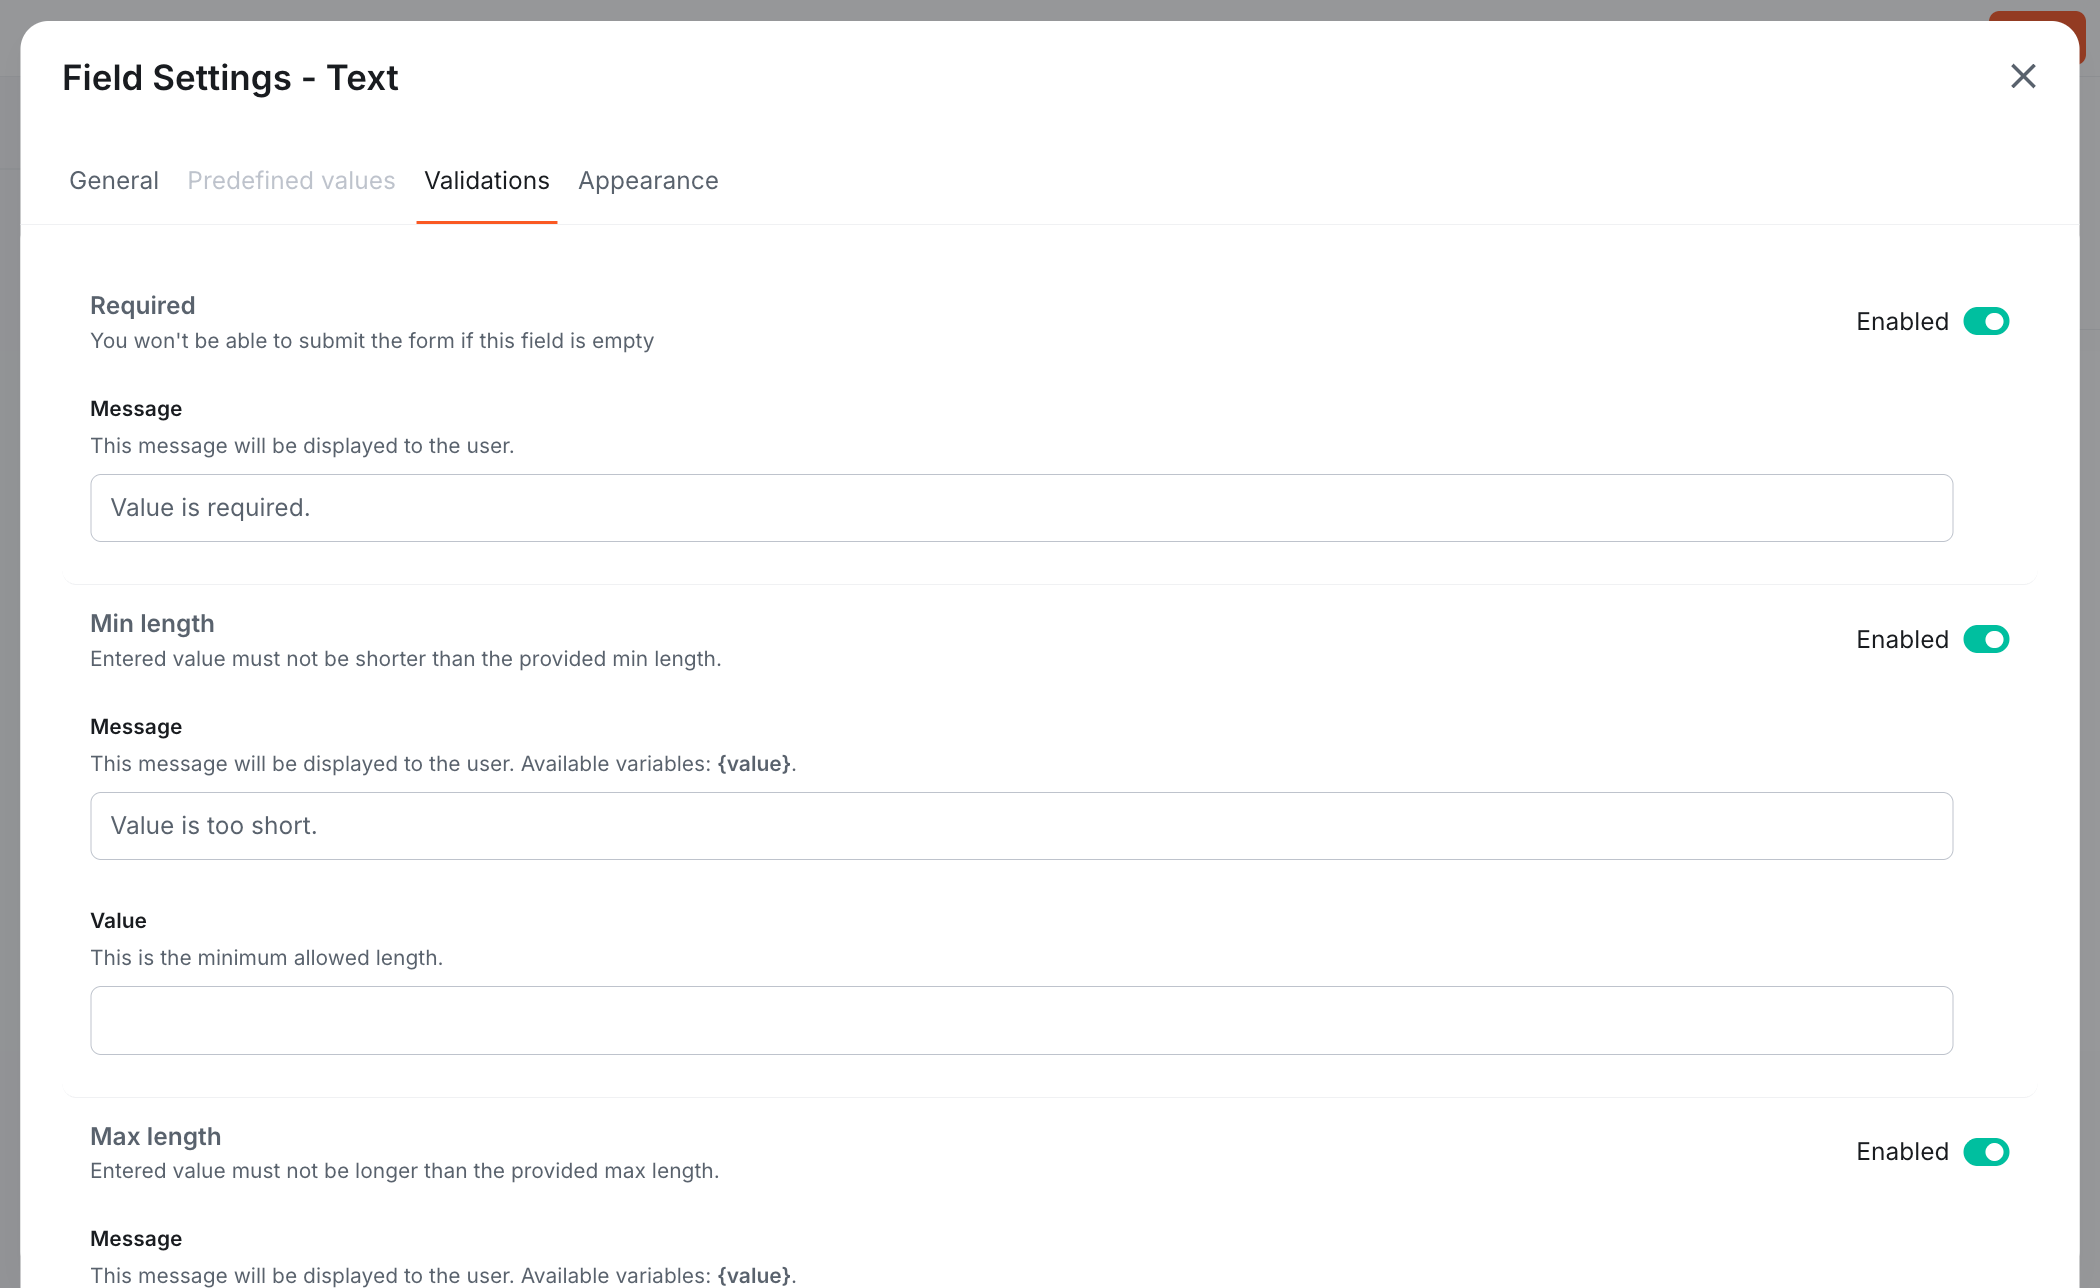
Enable and configure:
- Required: Enabled (toggle to ON)
- Min length: Enabled, Value: 3
- Max length: Enabled, Value: 100
Click Save Field to add it to your model.
This is the main product title that will be displayed to customers.
2. SKU (Text Field)
Drag another Text field onto the canvas. In the settings modal:
General tab:
- Label: SKU
- Field ID: sku
- Help text: Stock Keeping Unit - unique product identifier
Validations tab:
- Required: Yes
- Unique: Yes (ensures no duplicate SKUs)
Click Save Field.
The SKU is a unique identifier for inventory management.
Webiny provides rich validation options including required fields, unique values, min/max length, regex patterns, and more. These rules are enforced both in the Admin UI and via the API.
3. Description (Long Text Field)
Drag the Long text field onto the canvas:
General tab:
- Label: Description
- Field ID: description
Validations tab:
- Required: Yes
- Min length: 10
Click Save Field.
Long text fields support multi-line content, perfect for product descriptions.
4. Price (Number Field)
Drag the Number field onto the canvas:
General tab:
- Label: Price
- Field ID: price
Validations tab:
Enable and configure:
- Required: Enabled (toggle to ON)
- Greater or equal: Enabled, Value: 0 (ensures price cannot be negative)
Click Save Field.
Store the price as a number for calculations and filtering.
We've used Text, Long text, and Number fields for this tutorial. Webiny also supports Rich text, Boolean, Date/Time, File, Reference, Object, and more. You can explore these when building your own models!
Step 3: Save the Model
Once you've added all four fields:
- Click Save in the top right
- Your content model is now created!
As soon as you save the model, Webiny automatically generates a complete GraphQL API with queries and mutations for creating, reading, updating, and deleting products. The first text field you added (Name) is automatically set as the title field, which will be displayed in entry lists.
What Just Happened?
By creating this content model through the UI, Webiny automatically:
- Generated GraphQL API - Queries and mutations for CRUD operations
- Created Admin UI - A form for creating and editing products
- Set up validation - Rules are enforced on both frontend and backend
- Enabled versioning - Every product entry will have full version history
Testing Your Model
Now that your Product model is created, let's test it by creating an entry:
- Navigate to Content in the main menu
- Expand Ungrouped to see your models
- Click on Product

You'll see the Products list view (currently empty). Click + New Product to create your first entry.
- Fill out the form with sample product data:
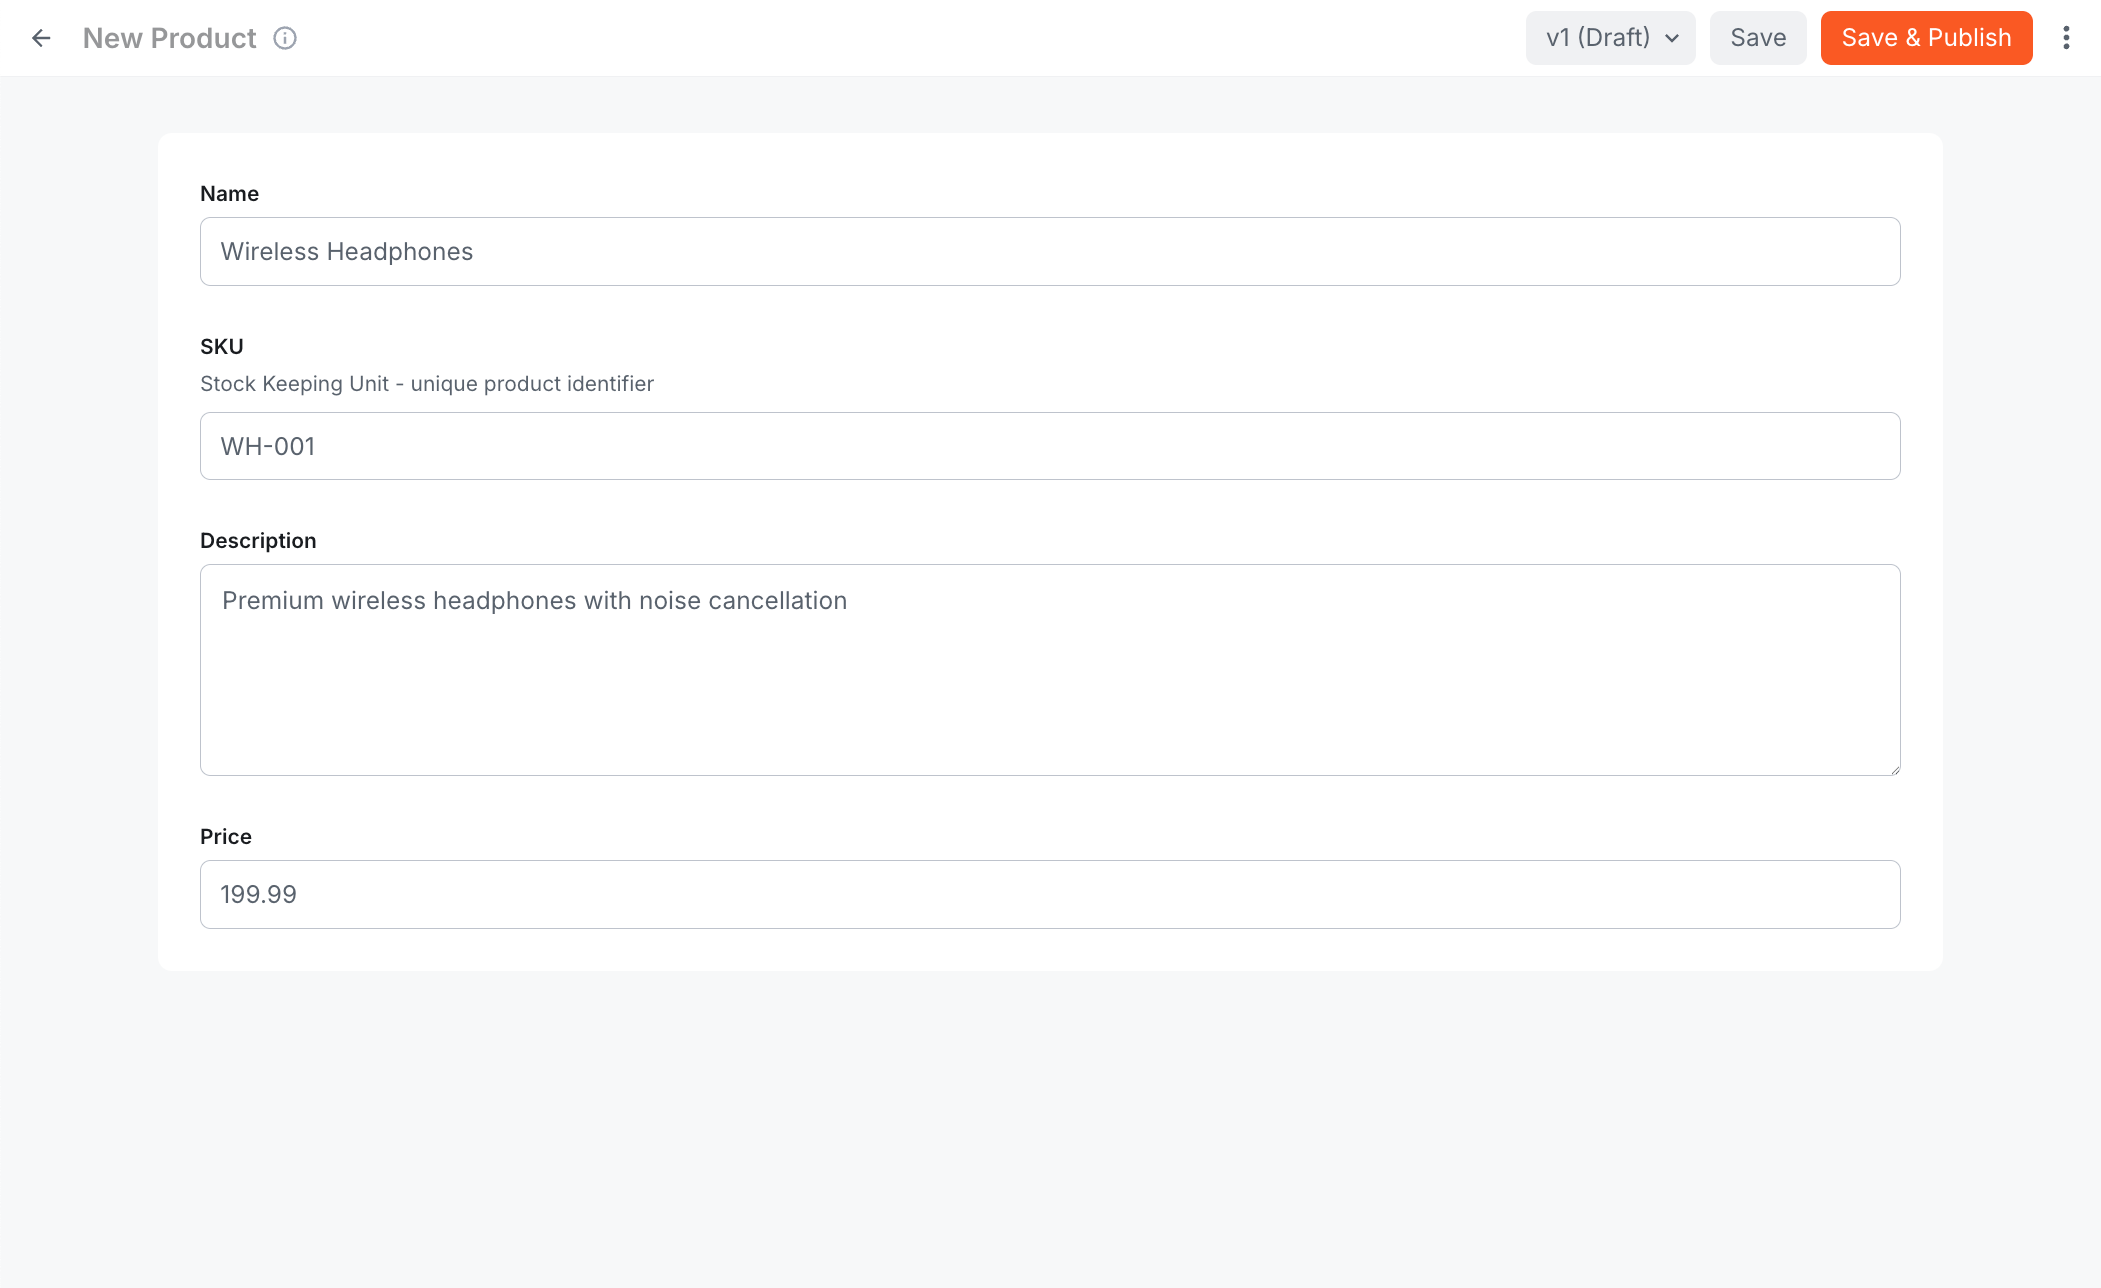
- Name: "Wireless Headphones"
- SKU: "WH-001"
- Description: "Premium wireless headphones with noise cancellation"
- Price: 199.99
- Click Save in the top right
You've just created your first product entry!
This entry is created as revision 1 (v1) with draft status. Notice the "v1 (Draft)" indicator in the top right. You'll need to click Save & Publish to publish it before it appears in the public Read API.
Modifying the Model
Need to add or change fields? You can modify the model anytime:
- Go to Content Modeling > Models in the main menu
- Find your Product model
- Click the edit icon
- Add, remove, or modify fields
- Save your changes
When you modify a model, existing entries aren't automatically updated. If you add a new required field, you'll need to edit existing entries to provide values. Removing a field doesn't delete the data - it just hides it.
Next Steps
Now that you've created a Product model through the UI, you're ready to:
- Create models via code - In the next lesson, we'll create a Product Category model programmatically and link it to products using reference fields
- Understand the different APIs - Learn about Read, Preview, and Manage APIs and when to use each
- Query your data - Use the Webiny API Playground to interact with your content via GraphQL
It's time to take a quiz!
Test your knowledge and see what you've just learned.
What happens immediately after you save a new content model in Webiny?
Summary
Creating content models through the Webiny UI is intuitive and powerful:
- Visual builder - Drag-and-drop interface for creating models
- Rich field types - Text, numbers, files, dates, and more
- Validation rules - Ensure data quality and consistency
- Automatic API generation - GraphQL endpoints created instantly
- Admin forms - Content editing interface generated automatically
- Easy to modify - Change models anytime without breaking existing data
You've successfully created a Product content model with multiple field types and validation rules. In the next lesson, we'll create a Product Category model via code and learn how to link models together using reference fields.